Tuesday, September 10, 2013

Homemade Steak Sauce


     Today I am going to share a delicious recipe with you "Homemade Steak Sauce".  I know you're thinking to yourself "she can't afford steak" and you'd be right.  ;-)   But I have a recipe for some anyway and canned four jars full today.  By the way, my steak sauce tastes similar to the "57 variety" kind of sauce.

Homemade Steak Sauce
 
2 c. ketchup
3/4 c. Worcestershire sauce
1/2 c. water
1/2 c. lemon juice
1/2 c. white vinegar
4 T. brown sugar
2 T. Teriyaki sauce
2 T. yellow mustard
2 tsp. garlic powder


    Combine all ingredients in a pot and bring to a gentle boil.  Once it boils, turn to simmer and let it simmer 30 minutes.  Transfer the sauce to hot, sterilized jars and water bath process them for 15 minutes.  Makes enough to fill 4 half-pint jars.

homemade steak sauce, how to make sauces and condiments
      
If you liked this recipe, check out my recipes for Tangy BBQ Sauce and Homemade Spaghetti Sauce.
 
Follow me on Youtube
Follow me on Instagram 
Follow me on Pinterest
Follow me on Twitter


Monday, September 9, 2013

Homemade Taco Seasoning

    One way I like to save money is by making a lot of my own "seasonings" and sauces instead of buying them.  Taco Seasoning is a great example.  I can make up a pint jar full of mix for less than $1.00 and it equals the amount of about 16 envelopes of store-bought taco seasoning.  The cost comparison alone should make you want to try it.


homemade taco seasoning, how to make your own seasonings, frugal living tips,
   As you can see from my jar, you use 2 tablespoons of my mix to equal one store-bought envelope of taco seasoning.


Taco Seasoning

 1 c. chili powder
1/2 c. onion powder
1/4 c. plus 2 T. cumin
2 T. garlic powder
2 T. paprika
2 T. salt

Mix all ingredients together and store.  We put ours in a pint canning jar and it works great.
 
To use, mix together 2 tablespoons of taco seasoning with 1/2 cup of water. 
 
 
Be sure to check out my Homemade Taco Sauce too.

You might also like my Kale Pestomy Greek Spice Blend, and my Sweet Cinnamon Butter!


Follow us on Pinterest
Follow us on Twitter
Follow our Youtube Channel
Follow us on Instagram
 

Chicken Waterer Giveaway

  Come enter for your chance to win a BriteTap combo Pack.  The combo pack consists of a BriteTap waterer and 2-Gallon insulated supply tank.  It's a retail value of $69.95 + $19 in shipping.  As an added bonus, when you "like" the Chicken Waterer on Facebook, you will get a 10% discount on merchandise sold on their Facebook page store.  Just  click the "Shop Now" store button on the top of their page and you'll  be taken to a place where you can purchase products while on facebook.  Now, just scroll down to enter via Rafflecopter!

giveaway, blog giveaway, Chicken Waterer, Brite Tap,
The BriteTap Chicken Waterer

giveaway, blog giveaway, Chicken Waterer, Brite Tap,
A chicken getting a drink from the waterer
a Rafflecopter giveaway


Sunday, September 8, 2013

Dehydrating Acorn Squash

   Another vegetable we had an abundance of from our garden this year was Acorn Squash.  And as you can tell from my posts, my favorite way of preserving is by dehydration.  Today, I am dehydrating acorn squash.
   Acorn squash is very tasty and sweet tasting.  It contains no fat; it is low calorie; and just 1/2 cup provides 18% of your daily recommended amount of fiber and 20% of your daily recommended amount of Vitamin C.
     To dehydrate acorn squash, just wash it and then cut it in half.

acorn squash, what to do with acorn squash, dehydrating vegetables, garden harvest,

Then, scoop out the seeds and place the squash on a baking sheet and cover with foil.  Place them in a 350 degree preheated oven for 30 minutes.  Remove from the oven and let them cool.  Once they are cool, remove the skin and cut the squash into 1/2"-3/4" squares.  Dehydrate in your dehydrator for 12 hours.

acorn squash, what to do with acorn squash, dehydrating vegetables, garden harvest,
The dehydrated acorn squash.

     To use, soak the squash in really hot water for 15-30 minutes and then throw them into a soup, casserole or stew.  You can also mash them up or roast them.  Also, acorn squash seeds can be toasted and eaten.
 
        I also have dehydrated Yellow Squash and made up some Butternut Squash Chips so be sure to check them out.


 Follow us on Facebook
Follow me on Pinterest
Follow us on Twitter
Follow us on g+
Follow our Youtube channel
Follow me on Instagram 


I shared this post with the following blogs:

Create with Joy 
The Chicken Chick

Saturday, September 7, 2013

Canning Apple Pie Filling

   We had about 4 lbs. of apples given to us recently.  We have apple trees but they are young and are not bearing fruit yet (except for our crab apple trees).  Anyway, I decided to make up some apple pie filling and can it.  Here is how I did it:


Apple Pie Filling
 
 3-4 lbs. apples
10 c. water
4 1/2 c. sugar
1 c. cornstarch
3 T. lemon juice
1 T. + 1 1/2 tsp. cinnamon
2 tsp. salt
1 tsp. nutmeg
1 tsp. cloves


canning apple pie filling, preserving food, how to can apple pie filling, what to do with apples, how to make an apple pie

      Wash, peel, core and slice your apples.  Place in a bowl of water and set aside.  Take all other ingredients and stir them together in a large pot.  Bring to a boil and then turn the stove to medium heat and cook until the mixture becomes thick and bubbly.  
 
      Now, take the apple slices and pack them into hot, sterilized quart sized jar.  Then, pour the hot syrup over the apples.  Take a knife and run down inside the jars and around to remove all air bubbles and to be sure the syrup gets all the way down to the bottom.  Fill each jar this way.  Seal and process via water bath process for 20 minutes.  This will make 4 one quart jars.        


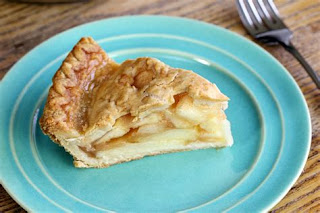
    Be sure to use my Extra Flaky Never-Fail Pie Crust.


       This apple pie filling goes great in my Crock Pot Apple Dump Cake or my Southern Fried Hand Pies recipe.


Follow us on Pinterest
Follow us on Twitter
Follow our Youtube Channel
Follow us on Instagram

Friday, September 6, 2013

Crab Apple Jelly

  We have several crab apple trees on our homestead so I decided to make some Crab Apple Jelly with some of them.  It's quite easy and makes some really, really delicious jelly.


Crab Apple Jelly


crab apples
sugar 
apple cider vinegar

   I soak my crab apples in a sink full of water and I add in about 1/4 cup of apple cider vinegar.  Let the apples soak for 30 minutes.  If the crab apples are big enough, remove the stems.  Our crab apples were super tiny and I just left the stems on them.  We had about 3 1/2-4 lbs. of tiny crab apples.


Now, put the crab apples into a large pot and cover with water.

      Bring them to a boil and then simmer them for 30 minutes.  Pour through a sieve and now you have the juice needed to make the jelly.  At this point, I threw out the boiled crab apples for the goats and donkeys.  Take the juice and measure it.  We ended up with 6 cups of juice.


what to do with crab apples, how to make crab apple jelly, crab apple jelly recipe,

      Put the juice into a pot and add in the sugar.  We used 4 1/2 cups of sugar but just use 3/4 cups of sugar for every 1 cup of juice you get.   I also stirred in 4 drops of red food coloring to make it look prettier but that is not needed.  The juice shown above is what it looks like without the added color.

      Bring the mixture to a boil, turn the heat down to medium and let it gently boil for 15 minutes, stirring the whole time.  Once the timer goes off, pour into hot sterilized jars and water bath process them for 10 minutes.  Crab Apples contain natural pectin and do not require any added.  You can use Clear Jel if you want though for a better set. 
 
 This made us 7 jars of jelly.


what to do with crab apples, how to make crab apple jelly, crab apple jelly recipe,


        You might like to check out my COFFEE Jelly Recipe and my Cherry Amaretto Jam recipe.
 
    This jelly goes great on homemade biscuits or toast. 


 Follow us on Pinterest
Follow us on Twitter
Follow our Youtube Channel
Follow us on Instagram


Wednesday, September 4, 2013

Flavorful Zucchini Sticks

   If your garden was like my garden this year, then you had an abundance of zucchini.  Here it is the 1st week of September and the harvesting of zucchini isn't slowing down a bit and won't for awhile.  Because we are getting so many, we are finding lots of ways to make and preserve this wonderful vegetable.  We dehydrate zucchini in shreds, cubed, and make zucchini chips with them.  We also make Parmesan Zucchini and today, we are making Flavorful Zucchini Sticks.  :-)


Flavorful Zucchini Sticks
 
 1-2 large zucchini
1/2 c. flour
1/4 c. Parmesan cheese 
2 eggs
3 T. milk
1 tsp. oregano
1/2 tsp. garlic powder
1/8 tsp. pepper


    Peel the zucchini and slice off the ends.  Preheat the oven to 425 degrees and spray a cookie sheet with cooking spray.  Now take the zucchini and cut them into about 3" long "sticks".

zucchini sticks, big zucchini from garden, dehydrating zucchini, easy zucchini recipe, ways to prepare zucchini,
 
  Now whisk the eggs and milk together in a small bowl.
 
zucchini sticks, big zucchini from garden, dehydrating zucchini, easy zucchini recipe, ways to prepare zucchini,


  Then in a separate bowl, mix together the flour and spices.  


zucchini sticks, big zucchini from garden, dehydrating zucchini, easy zucchini recipe, ways to prepare zucchini,


   Now, take a few of the zucchini sticks and roll them in the flour mixture, then into the egg mixture, and then back into the flour mixture until each one is coated well.  Place the coated sticks onto the baking tray and bake for 20 minutes.  


Follow us on Pinterest
Follow us on Twitter
Follow our Youtube Channel
Follow us on Instagram
Follow me on MeWe
Follow me on Parler  

Update on Ronny & Memorizing Memory Verses

As most of you know, Ronny is autistic. He is now 21 and besides being autistic he is also suffers from agoraphobia.  I am now bedbound due ...