Sunday, November 25, 2018

Incredible Apple Pie Enchiladas

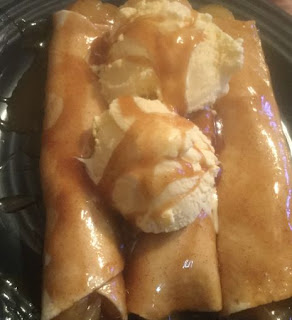
    These Incredible Apple Pie enchiladas give you all the cinnamony goodness of a hot apple pie but instead it is stuffed into a tortilla and drizzled with a lovely caramel sauce.  For an extra treat, serve it with a scoop of ice cream for the perfect dessert.

apple enchiladas recipe, apple pie enchilada recipe, caramel cinnamon apple enchiladas, apple enchiladas with caramel sauce

    You just can't miss with this easy and delicious recipe!  

Incredible Apple Pie Enchiladas

16 flour tortillas
1 c. butter
1 c. sugar
1 c. brown sugar
1 c. water
1 T. cinnamon
1 tsp. vanilla
1/2 tsp. ginger
1/2 tsp. nutmeg

       Butter a sheet pan.  Lay out your tortillas.  If they are too stiff, put them into the oven for a minute or two and it should soften them right up.

apple enchiladas recipe, apple pie enchilada recipe, caramel cinnamon apple enchiladas, apple enchiladas with caramel sauce

        On each tortilla spread out about 1/4 of a cup of your pie filling.  

apple enchiladas recipe, apple pie enchilada recipe, caramel cinnamon apple enchiladas, apple enchiladas with caramel sauce

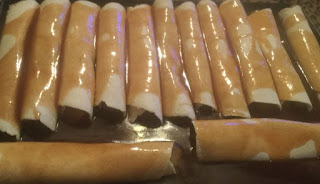
    Sprinkle on some cinnamon, a small bit of ginger and then nutmeg.  Now roll up the "enchilada" and place it in your buttered pan.  Continue with the rest of the tortillas.

apple enchiladas recipe, apple pie enchilada recipe, caramel cinnamon apple enchiladas, apple enchiladas with caramel sauce

    Set the pan aside and make the caramel sauce.
    In a medium sized pot, bring the butter, the sugars, and the water to a small boil.  Reduce the heat and simmer it for 3 minutes.  Be sure to keep stirring as it cooks.  Once it is done, pour the sauce over the enchiladas.

apple enchiladas recipe, apple pie enchilada recipe, caramel cinnamon apple enchiladas, apple enchiladas with caramel sauce

    Let stand for 15 minutes.  Preheat your oven to 350 degrees.  After 15 minutes, bake the enchiladas for 20 minutes.  Remove and enjoy.   So simple that it will become your new "go-to" dessert.  

apple enchiladas recipe, apple pie enchilada recipe, caramel cinnamon apple enchiladas, apple enchiladas with caramel sauce


Follow us on Pinterest
Follow us on Twitter
Follow our Youtube Channel
Follow us on Instagram


Saturday, November 24, 2018

Homemade Glazed Cinnamon Apple Fritter Recipe


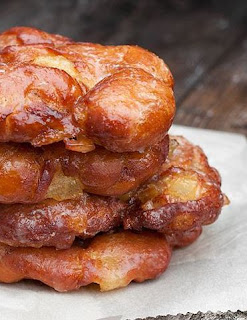
These apple fritters fry up perfectly.  Warm, sweet and just the right amount of cinnamon!  The batter turns out perfectly so you can make nice and fluffy fritters similar to a dumpling or you can also make them nice and flat...your choice. 

Mom's apple fritter recipe, easy apple fritters, glazed cinnamon apple fritter recipe, homemade glazed cinnamon apple fritter recipe,


Homemade Glazed Cinnamon Apple Fritters

1 1/4 c. diced apples
1 c. flour
1/4 c. milk
2 lg. eggs
2 T. sugar
2 tsp. baking powder
1 1/2 tsp. cinnamon
1/2 tsp. salt

For the Glaze: 

1 c. powdered sugar
1-2 T. milk
1/4 tsp. vanilla

     Mix together the flour, baking powder, cinnamon and salt and set aside. Mix together the eggs, sugar and milk.  Fold in the flour mixture until JUST moistened.  Then fold in the apples.

     Heat oil in a skillet to 275 degrees.  When the oil is hot enough, drop in 1/4 cups of batter into the oil.  Dropping them this way produces thick and fluffy fritters but if you want the flat type of fritter, pipe the dough into the oil instead.  We did the dumpling style here.  

      Cool on a wire rack.  As it cools, you can prepare the glaze by mixing all the ingredients together.  It should be the consistency that will run off a spoon.  If it is too thick, just add in a bit more milk.

    Drizzle the glaze over the apple fritters and enjoy.  You can just sprinkle powdered sugar over them or leave them plain.  They are delicious either way. 


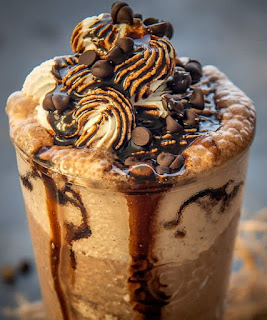
    These fritters pair nicely with my French Vanilla Coffee or my Double Chocolate Chip Frappe!


Follow us on Pinterest
Follow us on Twitter
Follow our Youtube Channel
Follow us on Instagram


Wednesday, November 21, 2018

Soft & Light Homemade Biscuits

    If you are looking for a soft, light and delicious biscuit recipe, this one is for you!  These bake up so light and tender every single time you make them.  Every time I make them the boys (my hubby and 2 sons) run to get them and literally within minutes they are all gone so I always make 2 batches so we have some for our evening meal too.


Soft & Light Homemade Biscuits
 
1 1/2 c. flour
2/3 c. whole milk
1/3 c. pre-creamed shortening
1 T. sugar
1 1/2 tsp. salt
 
         Preheat your oven to 425 degrees.  
 
         Put all your ingredients into a large bowl and stir just until a wet dough forms.  Do not overmix because overmixing causes your biscuits to be tough. Turn the dough out onto a floured surface and knead exactly 6 times (no more and no less).  

        Roll out the dough to 1/2" thickness and using a biscuit cutter cut out your biscuits.  

Easy homemade biscuits, fluffy biscuits recipe, Southern biscuit recipe, the most fluffy biscuits ever, grandma's biscuits,


          Place the biscuits onto a cookie sheet, leaving about an inch in between each biscuit.

Easy homemade biscuits, fluffy biscuits recipe, Southern biscuit recipe, the most fluffy biscuits ever, grandma's biscuits,

       
     Bake for 11 minutes.   Makes 8 biscuits.


     I love to eat these biscuits for breakfast with some of my Cherry Amaretto Jelly or Corn Cob Jelly!


Follow us on Pinterest
Follow us on Twitter
Follow our Youtube Channel
Follow us on Instagram

Monday, November 19, 2018

Delicious Cranberry Chutney Recipe

       This Cranberry Chutney is so delicious.  I swear if you make it and try it, you will absolutley LOVE it.  It is so aromatic and has the best flavor.  It will become a yearly Thanksgiving favorite that will get you praise each and every single year.  It is very smooth and not bitter at all like some cranberry recipes can be. It is absolutely berrylicious!


    Cranberry Chutney is the perfect side to your Thanksgiving meal.   It is great as an appetizer served with Brie and some crackers or serve it over some sliced turkey or roast pork.  The slightly tart and sweet flavor just goes so well with so many things.

       It is really easy to make and tastes so much fresher and better than anything you can buy at the store! 

Cranberry Chutney

1 1/2 c. sugar
1 c. water
1 (12 oz.) bag of cranberries
2 medium sized apples
1 T. lemon juice
2 tsp. cinnamon
1 tsp. ground allspice
dash of salt

   
easy and unique cranberry recipe for Thanksgiving, apple cranberry chutney,  easy cranberry recipe for the perfect Thanksgiving meal,


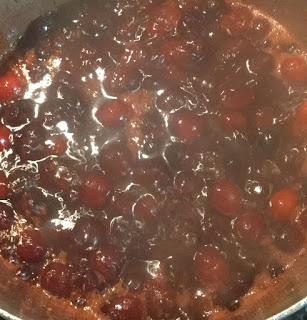
    In a medium saucepot, add in the cranberries, water, sugar, allspice, lemon juice, salt and cinnamon.

easy and unique cranberry recipe for Thanksgiving, apple cranberry chutney,  easy cranberry recipe for the perfect Thanksgiving meal,

 
     Bring up to a boil and boil for 2 minutes.  Cover and cook on medium for 5 minutes or until cranberries "pop".    As they cook, prepare your apples.

easy and unique cranberry recipe for Thanksgiving, apple cranberry chutney,  easy cranberry recipe for the perfect Thanksgiving meal,


     Peel your apples and then dice them.

easy and unique cranberry recipe for Thanksgiving, apple cranberry chutney,  easy cranberry recipe for the perfect Thanksgiving meal,


  Stir the apples in with the other ingredients in the pot.  Cover and cook on medium for about 15 minutes, or until the apples are soft. 


easy and unique cranberry recipe for Thanksgiving, apple cranberry chutney,  easy cranberry recipe for the perfect Thanksgiving meal,

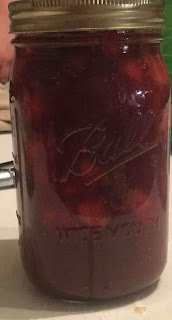
    Allow it to cool and then place into the refrigerator.   I store mine in a mason jar.

easy and unique cranberry recipe for Thanksgiving, apple cranberry chutney,  easy cranberry recipe for the perfect Thanksgiving meal,


    Isn't it so lovely?!
 
Follow us on Pinterest
Follow us on Twitter
Follow our Youtube Channel
Follow us on Instagram


Sunday, November 18, 2018

Homemade Shake 'n Bake (Shake and Bake Mix) Recipe

    Today I am going to show you how to make a delicious coating mix for your chicken or pork.  It is basically a homemade version of the popular "Shake 'n Bake" you can find at your local store.  Lately the cost of even the generic brands has increased to nearly $3 a box locally so I wanted to make my own that would not only be cheaper but free of the preservatives and other "icky" things.  This is what I came up with and let me tell you IT IS DELICIOUS!!!!


     This recipe makes enough to equal 4 boxes of the bought stuff so use what you want and store the rest in a mason jar in the refrigerator.  It can last about a month in the fridge or store it in the freezer for several months.

Homemade Shake and Bake Mix


4 c. bread crumbs (1 box of Panko)
1/4 c. olive oil
1 T. paprika
1  1/2 tsp. seasoning salt
1 tsp. pepper
1/2 tsp. onion powder
1/2 tsp. garlic powder
1/2 tsp. parsley
1/2 tsp. oregano
1/2 tsp. basil
1/2 tsp. salt

   Place all into a mason jar and shake well.  Use as you would the "box" variety.  I just take a cup of it and put it in a large baggie and place a piece of meat into the baggie and shake well.

Homemade Shake n Bake Copycat Kraft Recipe, Homemade Shake N Bake Pork Chops, How to Make Homemade Shake and Bake Mix

How to Make Homemade Shake and Bake Mix, Homemade Shake N Bake Pork Chops, Homemade Shake n Bake Copycat Kraft Recipe,
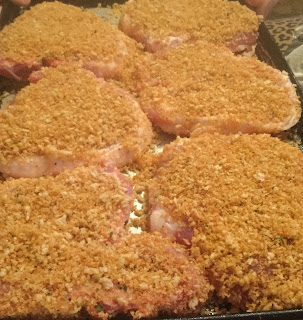
Coated and ready to go into the oven.


    This time I used pork chops.  Bake in a preheated 425 degree oven for about 17 minutes.  That little bit of oil added to the mix makes the meat come out with a super delicious crispy outside.


  When cooking chicken I cook the coated chicken in a 400 degree oven for 20 minutes for boneless chicken and 45 minutes for bone-in chicken.  Be sure to check the internal temperature of whatever meat you are cooking to be sure it is cooked thoroughly.

   Be sure to check out my "Bisquick" recipe too.  
 
Follow us on Pinterest
Follow us on Twitter
Follow our Youtube Channel
Follow us on Instagram


Saturday, November 17, 2018

The Best Creamy Corn Casserole Recipe

    This corn casserole is such a comforting side dish that is perfect for a holiday meal or any meal for that fact.  It truly is one of my personal favorite side dishes of ALL TIME!  It is very easy to make and tastes so delicious and creamy.


awesome and easy corn casserole, best creamy corn casserole, corn casserole for the holidays, corn casserole recipe, simple corn casserole


    Before I get to how to make this creamy corn casserole, I want to give you a few tips. For starters, you do need to drain the whole kernel corn but NOT the cream style corn.  Next, be sure to use full fat sour cream.  I have used the "light" varieties but it just does not turn out as well and it does effect the taste quite a bit.  Also, if you don't use the full fat kind of sour cream then your casserole will not be as creamy.  Also, be sure to include the sugar and not to omit it.  I know it does not seem like a lot so if you are thinking about leaving it out...don't!  It is a small amount but it does affect the flavor a LOT!


The Best Creamy Corn Casserole Recipe
  
1 c. shredded cheddar cheese
1/2 c. butter
1 can (15 oz.) whole kernel corn, drained
1 can (15 oz.) cream style corn
1 tsp. sugar

     Preheat your oven to 350 degrees.  Spray a 9"x13" cake pan with cooking spray.  Be sure to spray it on the bottom and sides really well because you do not want the casserole to stick to the pan...and believe me, it will if it's not coated well.

simple corn casserole, corn casserole recipe, awesome and easy corn casserole, corn casserole for the holidays, best creamy corn casserole


        In a large bowl, combine all the ingredients and stir well.  Pour the "batter" into the cake pan and spread it out evenly.


simple corn casserole, corn casserole recipe, awesome and easy corn casserole, corn casserole for the holidays, best creamy corn casserole


     Bake for 38-42 minutes or until done.  When the edges are golden brown, it is ready.  Don't worry if the middle of the casserole is still real light because that is the way it is supposed to be.  Just be sure to not overbake it or it will lose its creaminess.


Follow us on Pinterest
Follow us on Twitter
Follow our Youtube Channel
Follow us on Instagram


Monday, November 12, 2018

How to Dehydrate Mango

 
     My boys love mangoes but since we live in rural SE Oklahoma outside of a tiny community, mangoes are not so easily found.  If we can't find fresh mangoes, my boys beg me to buy the dried variety.  The only problem with the dried variety you can buy is that they are expensive and they contain sulfites and other preservatives.  Um, no thank you.


       Dried mangoes are not only easy to make but they turn out super sweet and make a healthy snack!  Once you dry mangoes, you'll never buy them again because the taste truly does not compare!

     To dehydrate mango, begin by thoroughly washing the skin.  Once they have been thoroughly rinsed with cool water, cut off each end of the mango.


    Sit the mango up and using a sharp knife begin cutting off the peel of the mango.  


   After all of the peel has been removed, cut up the mango into "sections" as shown in the below photo and place the pieces onto your dehydrator trays.


     Set your dehydrator to 135 degrees and dehdyrate the slices for 12-14 hours. 


Store the dried pieces in a canning jar until ready to eat.  Dried mangoes can be eaten as they are or they can be tossed into a salad, a smoothie or used in baked goods. 

     If you enjoyed this post over drying mangoes, I encourage you to check out some other how-to posts on drying fruit:  Pineapples, Cantaloupe, and Strawberries!


Follow me on Pinterest
Follow us on Facebook
Follow us on Twitter
Follow us on g+
Follow us on linkedin
Follow our Youtube channel
Follow me on Instagram 


Monday, November 5, 2018

No Bake Strawberry Kool-Aid Pie

    This pie is cool, creamy and delicious and would be perfect for any occasion!  Not only is it delicious but it is super easy to make and requires only 4 ingredients!  This pie will surely be a hit at your next party or get together.  You have to love a recipe that requires no baking and no cooking.  Everyone will think you spent hours creating this gorgeous dessert but don't worry...your secret is safe with me. 


    Since this recipe calls for a packet of Kool-Aid, you can decide to make the pie any flavor you want but my whole family loves strawberry and it makes such a pretty pink pie that we chose to use it for this pie.  Other favorites of ours to use are mixed berry (turns out baby blue) and lemon.

     Another really fun thing about this pie is it can be served two different ways.  You can refrigerate and chill it for one way or you can freeze it and serve it as a frozen pie.  Both ways are super delicious and we love it both ways.


No Bake Strawberry Kool-Aid Pie

graham cracker crust
1 pkg. strawberry Kool-Aid envelope

easy 4 ingredients, Kool-aid Pie, super easy pie for all occasions, no bake pie,


   In a large bowl, stir together the Kool-Aid and the sweetened condensed milk.  


easy 4 ingredients, Kool-aid Pie, super easy pie for all occasions, no bake pie,
Pouring the sweetened condensed milk into a bowl.


easy 4 ingredients, Kool-aid Pie, super easy pie for all occasions, no bake pie,
The kool-aid poweder poured into the sweetened condensed milk.


easy 4 ingredients, Kool-aid Pie, super easy pie for all occasions, no bake pie,
The sweetened condensed milk and the kool-aid mixed together.   Doesn't it look so pretty?!


    Now fold in the whipped topping.

easy 4 ingredients, Kool-aid Pie, super easy pie for all occasions, no bake pie,


easy 4 ingredients, Kool-aid Pie, super easy pie for all occasions, no bake pie,


easy 4 ingredients, Kool-aid Pie, super easy pie for all occasions, no bake pie,
Pouring the whipped topping into the mixture.

   Stir well.  Set out the pie crust.


easy 4 ingredients, Kool-aid Pie, super easy pie for all occasions, no bake pie,


   Spoon in the mixture into the crust.


   Cut and serve.  It is perfect on its own or top with some whipped topping.


   If you like this pie, I encourage you to try out some of my other pie recipes such as:  my Pumpkin Supreme Pie or my Chocolate Mousse Pie.  Both are so good!  
 
If you prefer, you can use a "regular" pie crust instead, if you do try my Extra Flaky Never-Fail Pie Crust
 

Follow us on Pinterest
Follow us on Twitter
Follow our Youtube Channel
Follow us on Instagram


Saturday, November 3, 2018

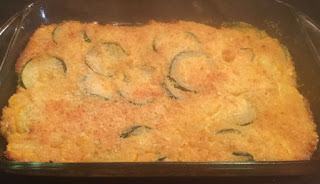
Zucchini, Squash & Corn Casserole


     This is a simple but super delicious casserole.  It is perfect for summer picnics or is a favorite side for your Thanksgiving or Christmas dinner.  No matter when you serve it, it will be a big hit around your table.

zucchini and yellow squash casserole, cheesy squash and zucchini casserole, Southern zucchini casserole,


Zucchini, Squash & Corn Casserole

 1 lb. zucchini, sliced
1 lb. yellow squash, sliced
1 can of corn, drained
1 1/2 c. shredded cheddar cheese
1 c. Panko breadcrumbs
1/2 c. sour cream 
1/4 c. butter
2 lg. eggs, beaten 
1 tsp. salt
1/4 tsp. pepper
1/4 tsp. garlic powder
 
 
zucchini and yellow squash casserole, cheesy squash and zucchini casserole, Southern zucchini casserole,
 
  Preheat your oven to 350 degrees.  In a large skillet, add the butter and then saute the zucchini, squash and onion until soft.  

zucchini and yellow squash casserole, cheesy squash and zucchini casserole, Southern zucchini casserole,


         Lightly spray a 9"x13" cake pan.  Using a large bowl, stir together the cooked vegetables, the corn, spices, cheese, eggs, and sour cream.  

zucchini and yellow squash casserole, cheesy squash and zucchini casserole, Southern zucchini casserole,

Spread the mixture out into the cake pan.

zucchini and yellow squash casserole, cheesy squash and zucchini casserole, Southern zucchini casserole,


 Now, sprinkle on the Panko bread crumbs.

zucchini and yellow squash casserole, cheesy squash and zucchini casserole, Southern zucchini casserole,

zucchini and yellow squash casserole, cheesy squash and zucchini casserole, Southern zucchini casserole,


    Place into the oven and bake for 25-30 minutes, or until the top is lightly browned.  

zucchini and yellow squash casserole, cheesy squash and zucchini casserole, Southern zucchini casserole,


     Dip up, serve, and enjoy!  Pairs perfectly with anything or even on its own.  

zucchini and yellow squash casserole, cheesy squash and zucchini casserole, Southern zucchini casserole,


     This casserole pairs beautifully with all kinds of meats but some of our favorites to serve it with include:  Glazed Pork ChopsSalisbury Steak, or my Soy & Garlic Chicken!


Follow us on Pinterest
Follow us on Twitter
Follow our Youtube Channel
Follow us on Instagram


I shared this recipe on the following blogs:

How to Make a Classic Christmas Rainbow Poke Cake

            This recipe has been around for a LONG time and to me, it never goes out of style.   It is colorful, festive, moist and utterl...