Monday, June 30, 2014

Making and Bagging your own French Fries at Home


   Our local grocery store often has 2 ten pound bags of potatoes on sale for $5.00 and I can't ever pass up that bargain.  I generally buy about 30-40 pounds of potatoes a month.  I dehydrate much of it but I also make and bag up a lot of homemade french fries and today I am going to tell you how I do it.


    Our family really enjoys french fries but I like making things from scratch so I know exactly what goes into the things my family eats.  But having the time and energy to cut up potatoes every time my family wants french fries is an issue at times.  Now, when I have extra time and potatoes, I just prepare them and bag them up and pop them in the freezer and they are ready to go when we need/want them.

   First just peel your potatoes and slice them into french fries.  We prefer the "steak" style of french fries but you can cut them like shoestring french fries if you wish.  As you are cutting the potatoes, place the peeled and cut potatoes into a bowl of cold water to keep them from turning brown.

How to make and bag up french fries at home, homemade french fries,
A bowlful of cut up potatoes.
  Once the potatoes are all cut up, place them on a cookie sheet or jelly roll pan, but make sure they are not touching one another, like so:

How to make and bag up french fries at home, homemade french fries,
The french fries ready to be flash frozen.
 
  Now, put the pan of french fries into the freezer for 1-2 hours to flash freeze them.  Once they are partially frozen, just remove off the pan and place into a large baggie.  You do this so that the french fries will not stick together.  Anyway, now you just put the baggie of french fries into your freezer until  you are ready to use them.  Remove and cook them like you would do a bag of store-bought french fries.  :-)

How to make and bag up french fries at home, homemade french fries,
The bag of frozen homemade french fries.

French Fries make a great side dish to Goulash or Pulled Pork Sandwiches!


Follow us on Pinterest
Follow us on Twitter
Follow our Youtube Channel
Follow us on Instagram


Friday, June 27, 2014

Update on Chloe

   For those of you who remember, we had a new baby goat born on our homestead on April 9th.   To refresh your memory, here is the post on her birth and pictures.  Well....baby Chloe is now 2 1/2 months old and my, oh, my, has she grown!

Saanen goat, baby goat eating, life on a farm
She is almost as big as her momma now.

Saanen goat, baby goat eating, life on a farm
I love her little horns.

Saanen goat, baby goat eating, life on a farm
Munching on some fresh leaves and bark that we cut for her to enjoy.


Follow my Pinterest board
Follow us on Facebook
Follow us on Twitter
Follow our Youtube channel

My Food Storage Review

    This is my review of the "My Food Storage" dehydrated foods (aka MRE's).   We were sent a family size meal of "Chili Mac".  The directions were easy to follow.

My food storage, MRE, dehydrated foods, MRE chili mac

My food storage, MRE, dehydrated foods, MRE chili mac

     As you can tell by the picture above, it looks like it should.  I was skeptical to how it may tastes but our whole family liked it.  My husband served with the USMC and said these were much more flavorful then the ones they served in the military. 
    With a shelf life of 25 years; the ease of preparation and the great taste....we recommend these.

I received one or more of the products mentioned above for free using Tomoson.com. Regardless, I only recommend products or services I use personally and believe will be good for my readers.

Thursday, June 26, 2014

Preserving the Harvest: Onions

    We have a garden and we always plant an overabundance so we can preserve some of the vegetables and fruits for use through out the year.   One of the vegetables we plant so much of is onions.  Onions are a food staple in our home.  They can be used in casseroles, soups, omelets, salsas and used on top of burgers or hot dogs or go into a chicken, tuna, or egg salad.   Onions are just so versatile!

Preserving the harvest, drying onions, dehydrating onions, how to preserve onions, drying onion slices, onion rings

     My favorite way of preserving onions is by dehydrating them.  When you can or freeze an onion, the texture and taste of onions are changed.   BUT when you dehydrate an onion and then rehydrate it, it is just like using a fresh onion.  The texture and taste is the same...it is unaltered.   I also prefer dehydrating over canning because it takes less effort to preserve them and takes up less space to store them.

    To begin with, just do a quick rinse of the onion and then peel it.  The reason you rinse the onion before you peel it is to remove anything on the skin so it will not get on the inner onion.   Now that it is peeled, you can cut up the onion.  I dehydrate my onions by cutting them in two different ways.  I cut them up and diced them into large chunks or I cut the onion into "rings".

Preserving the harvest, drying onions, dehydrating onions, how to preserve onions, drying onion slices, onion rings

 Once they are sliced, just place them on your dehydrator trays for about 10 hours.  I just turn on my dehydrator right before I go to bed and let them go all night and they are done in the morning.   To rehydrate the onions, just place the onions into some really hot water and let them set for about 10 minutes or just throw them into your casserole, soup, etc. if you will be cooking them anyway.

Preserving the harvest, drying onions, dehydrating onions, how to preserve onions, drying onion slices, onion rings
Dehydrated onion.
     These dehydrated chopped onions go in my Salisbury Steak recipes wonderfully or in my Loaded Boiled Cabbage!


Follow us on Pinterest
Follow us on Twitter
Follow our Youtube Channel
Follow us on Instagram

Wednesday, June 25, 2014

Grandpa's Feeders GIVEAWAY valued at over $600

   I am super excited to announce this next giveaway we are hosting.  Grandpa's Feeders has generously donated a feeder for us to try out and THREE other feeders to give away to three of my fans.   This giveaway is worth over $600!   How wonderful is this?!
Grandpa's Feeders, chicken feeder, rats eating chicken feed, how to keep rodents out of chicken feed, giveaway,
     Grandpa's Feeder gets shipped out to you right away when you order it.  When we opened the box, we were actually surprised about how pretty they are.  They are beautiful to look at and my husband was impressed by how well they are put together and all the little things the company did to ensure this works.  On their website, they have a very informative video showing you how it works and they give you tips on getting your chickens used to using the feeder.  Our chickens are on week 2 of the system and while the slight raising of the lid on this week still startles them, they are continuing to eat out of it.  We love it!
    If you think you don't need one of these, you are wrong.  These keep out the weather and RODENTS!   Grandpa's Feeders have painstakingly researched the weight of chickens and rodents, etc. and this feeder will not respond to the weight of the rodents, only to chickens.  And if you think you do not have rodents, I hope you are right but they are out and about and are probably stealing some of your chicken's feed as I type this. When I speak of rodents, I mean mice, rats, squirrels, birds, etc.   Any small animal that is a nuisance.  And it also helps with keeping the chickens from defecating on their feed because the lid closes when they are nit eating so the food stays clean also.  
     The Large chicken feeder will hold enough feed to feed 12 chickens for 10 days.  The standard feeder holds enough feed to 6 chickens for 10 days.  For this giveaway, we will randomly choose 3 people to each win one standard feeder valued at $215 each.


a Rafflecopter giveaway

The other two winners are:   entry #334  Julie M.
                                           entry #16    Max T.
                                            

Monday, June 23, 2014

Dehydrating Blackberries

     We have had an overabundance crop of wild blackberries this year.  We have foraged at least a half gallon every day.   We have been freezing a lot of them so I can make jams, jellies, syrups, muffins, pies and cobblers this winter but we are also dehydrating some.

drying blackberries, how to preserve your blackberry harvest, dehydrating blackberries,

     To prepare your berries for dehydrating (or freezing), fill your dish sink about 1/2 full of cold water.  Add in 3 T. of vinegar and let them set for 15-20 minutes.  Drain the berries and lay them out on your dehydrator trays.
drying blackberries, how to preserve your blackberry harvest, dehydrating blackberries,

   Turn on your dehydrator and let them dry for 12-14 hours (until they are hard with no moisture remaining).  I usually just turn my dehydrator on before I go to bed and they are ready the next morning.  Blackberries generally turn back to red when they dry but they still taste like a ripe blackberry.

    Now you can eat the dried fruit or you can store them for future use and rehydrate them.  Dried blackberries can be stored for many years.

drying blackberries, how to preserve your blackberry harvest, dehydrating blackberries,

     To rehydrate the blackberries, just place them in really hot water for about 15 minutes and then you can use them as you would any fresh berry.  
 
    You can also blend up the dehydrated blackberry and make it into blackberry powder. The blackberry powder goes great in some yogurt, icings, oatmeal and even ice cream. 


Follow us on Pinterest
Follow us on Twitter
Follow our Youtube Channel
Follow us on Instagram


Saturday, June 21, 2014

Pizza Lasagna Recipe


    Pizza lasagna is a nice change from regular lasagna.  We like to have it about once a month.


Pizza Lasagna
   
 lasagna noodles
pizza sauce
2 c. mozzarella cheesse
hamburger meat
pepperonis
2 c. ricotta or cottage cheese
2 tsp. Italian seasoning
Parmesan cheese
black olives
              
            The best part of making Pizza Lasagna is that you can alter the recipe to suit your tastes.  Other toppings you can add include onions, mushrooms, peppers, etc. 

     Begin by preheating your oven to 350 degrees.  Spray a 13" x 9" cake pan with cooking spray and line the bottom of the cake pan with a layer of lasagna noodles.  I have found that you do not need to cook the noodles first.  They cook just fine this way and it removes a step that is not needed.

     Next ladle on some of the pasta sauce; then the meat toppings; cottage cheese and then mozzarella cheese and a bit of Italian seasoning.  Just keep alternating layers this way. 
 

Pizza Lasagna, how to make lasagna, something different for dinner tonight, recipe for families, kid friendly recipe


 Also, I have found when making lasagnas that cottage cheese tastes just like the ricotta cheese and is cheaper to buy so I use cottage cheese instead.

   The final layer is when we add in the black olives.

Pizza Lasagna, how to make lasagna, something different for dinner tonight, recipe for families, kid friendly recipe

  For our family, it is just enough.   Add a bunch of mozzarella cheese to the top and sprinkle on some Parmesan cheese and bake for 30 minutes.  

Pizza Lasagna, how to make lasagna, something different for dinner tonight, recipe for families, kid friendly recipe

             
If you love Pizza like we do, be sure to check out:  Pizza Tater Tot Casserole and How to make your own Pizzas at home (crust and sauce recipe).  
 
 
Follow us on Pinterest
Follow us on Twitter
Follow our Youtube Channel
Follow us on Instagram


Friday, June 20, 2014

Cool Hand Art


   I am always trying to find different art projects and crafts to do with my kids.  Today we decided to do some hand tracing like you would do to make a turkey at Thanksgiving, etc.  Once I traced my hand, I got creative and this is what we did instead.  When you are done, it looks almost like a 3D hand print.  At least, if you are a better artist than I am, it will.

Homeschooling art ideas, how to make a 3D hand, fun art projects for kids
First, just trace around your hand on a plain piece of paper. 

Homeschooling art ideas, how to make a 3D hand, fun art projects for kids
Like this.

Homeschooling art ideas, how to make a 3D hand, fun art projects for kids
Now take a black marker and start putting lines across the page and over the hand. When you reach the tracing of the hand kind of curve the line like the picture shows.

Homeschooling art ideas, how to make a 3D hand, fun art projects for kids
It should look like this when you are done.

Homeschooling art ideas, how to make a 3D hand, fun art projects for kids
Now take one color, your choice, (I used brown) and just color a line right up against the black lines.

Homeschooling art ideas, how to make a 3D hand, fun art projects for kids
Now choose another color and add it to the lines.  You can be sloppy or neat or do thick lines or thin.  Have fun with it.

Homeschooling art ideas, how to make a 3D hand, fun art projects for kids
Keep going and adding colors until you are done and "Poof" magically you end up with a 3D rendition of your hand. 

     Hope you liked seeing how I did it and hope you and your family have fun doing this art project.  :-)


For other great ideas for kids, check out my Kids Summer Bucket List and Handprint Fall Art.

Follow us on Facebook
Follow me on Pinterest
Follow us on Twitter
Follow us on g+
Follow our Youtube channel
Follow me on Instagram 

Monday, June 16, 2014

Frugal & Fun Sun Catchers

     I am pleased to have a guest blogger today.  Please welcome Michelle Wiederhoft.
Michelle states:
A little bio about me:

I was born and bred in St Paul, Minnesota and still live in a small suburb of the city.  I am happily married to my best friend, Ron and have been for 14 years.  My daughter, Emma, is 10-1/2 and the light of my life. She is a wonderfully bright, beautiful and funny child who just happens to have AD/HD and is on the Autism Spectrum.

frugal and easy sun catchers, homeschool craft, ASD, Austism
Emma
 We love to go camping, go to museums and historical sites.  We love to watch NASCAR and Minnesota Vikings football.  I love to do crafts and small gardening/planting.  I am a co-leader for my daughter's Girl Scout troop so I get to do the things I love and help other young girls learn about it and enjoy it too.

frugal and easy sun catchers, homeschool craft, ASD, autism
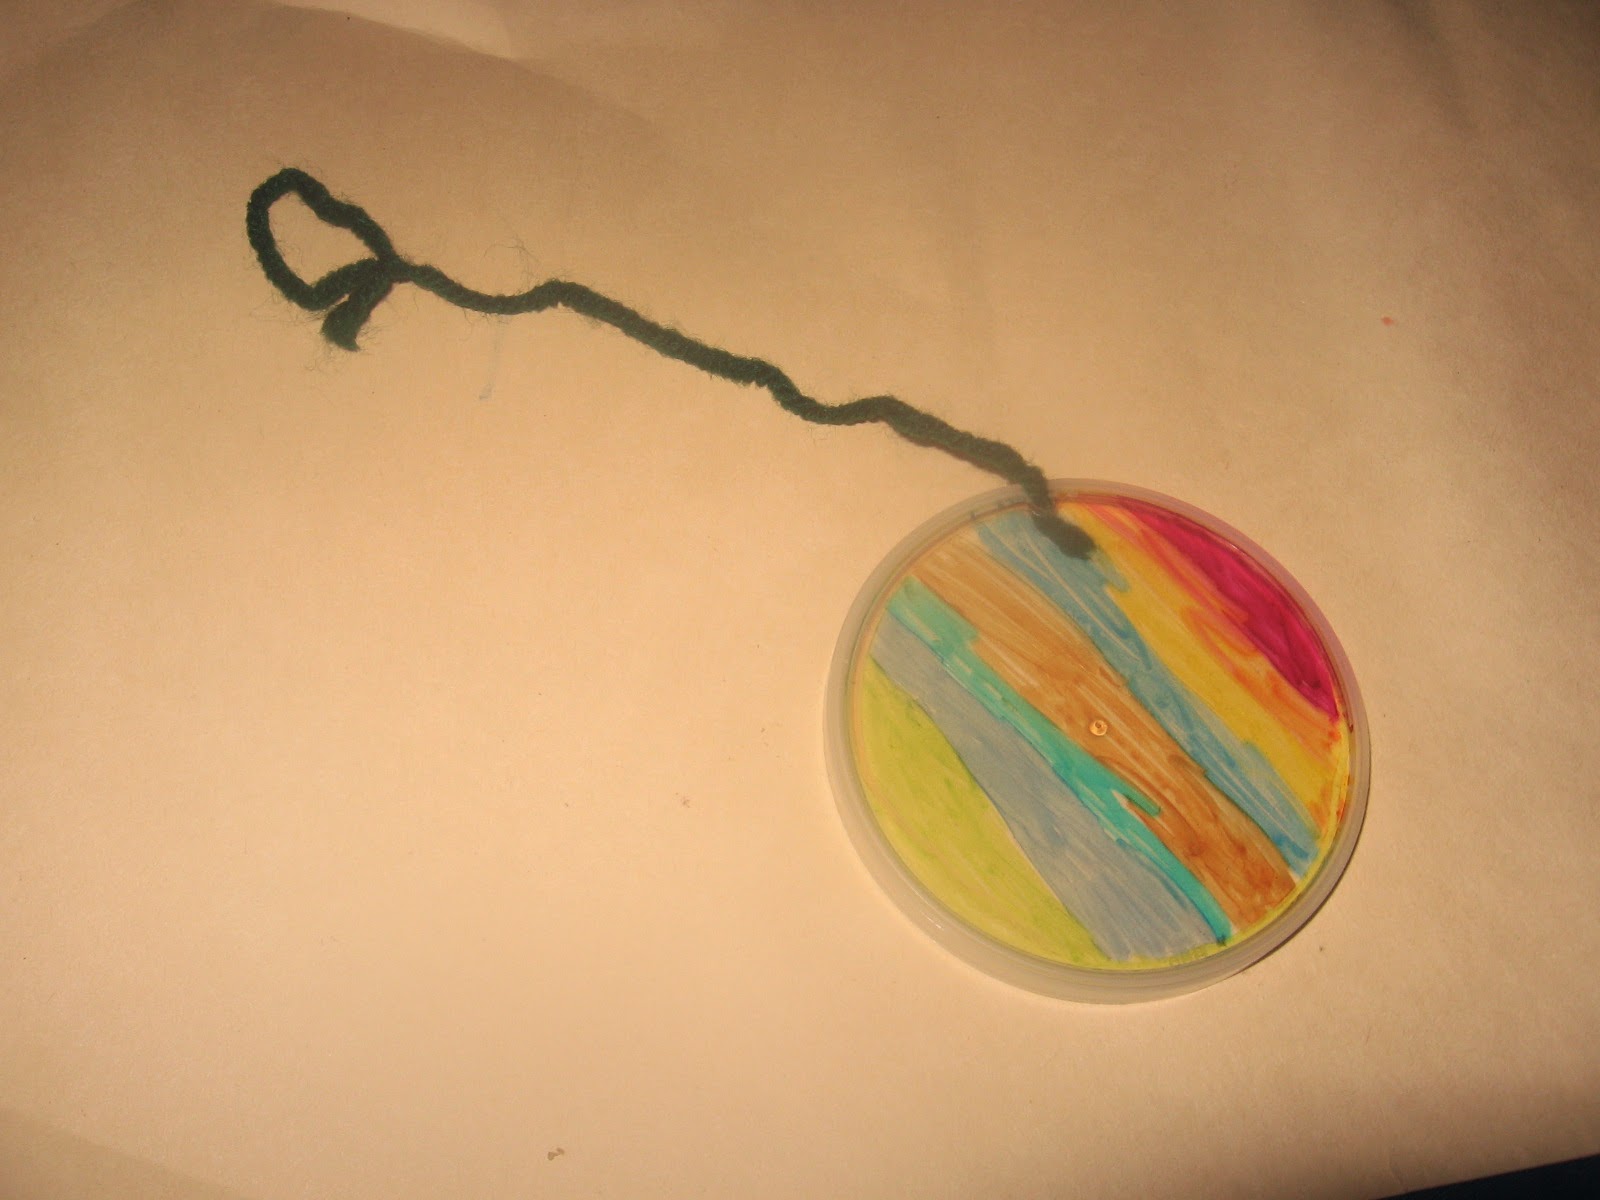
The finished sun catchers


                                                               SUN CATCHER ORNAMENTS

This is a simple, inexpensive craft project to do with kids of all ages.  You can make these in many different sizes with whatever design your mind can imagine.

What you need for this craft:
frugal and easy sun catchers, homeschool craft, ASD, autism

Clear Pringles or other plastic lid (needs to be clear)
Sharpie or Bic permanent markers (the kids washable markers do not work on these)
Hole punch
Scissors (to cut string)
String cut to whatever length you would like (I usually cut them to 6-12” lengths) you can use yarn, thread, fishing line or whatever works for you)

First wash the lid in soapy water and completely dry it.  This gets the oils from the food items off of them and lets the marker adhere to it better.  It also gets rid of fingerprints.

Next, use your hole punch to make a hole for the string to hang it.  You could also use the sharp point of your scissor or a knife to make the hole if you don’t have a hole punch.  This will now be the top of your sun catcher.

Next, have your child (or yourself) just start making whatever design you want on your lid.  Personally, I do the coloring on the inside of the lid, however either side of the lid works.  Using brighter or darker colors works the best.  Sometimes the lighter colors don’t show up that well.

frugal and easy sun catchers, homeschool craft, ASD, autism
After you are done designing it, you can take your string and tie it on the lid.  Depending on how big the hole is, you can either string it like you would a necklace or tie off a knot at the lid and one at the top, either as a knot or a loop like for a yo-yo.  Hang them in a window and enjoy!
frugal and easy sun catchers, homeschool craft, ASD, autism


If you like making crafts, check these out:  How to make a ball & How to make Play-Doh.


Follow us on Facebook
Follow me on Pinterest
Follow us on Twitter
Follow us on g+
Follow our Youtube channel
Follow me on Instagram 


Wednesday, June 4, 2014

Kids Summer Bucket List Ideas with Free Downloadable

   I think it is important for kids to be kids and do enjoyable things.  Kids today grow up too fast and rely heavily on electronics for their enjoyment.  I have come up with a Summer Bucket List with the kinds of things I enjoyed doing as a child and made lots of good memories in the process.


2014 Kids Summer Bucket List Ideas

Click here: (2014 Kids Summer Bucket List Ideas) to download the file and print it off for your own use. 

Check out one of our recent camping trips!

Follow us on Facebook
Follow me on Pinterest
Follow us on Twitter
Follow us on g+
Follow our Youtube channel
Follow me on Instagram 


I shared this post with the following blogs:

Monday, June 2, 2014

Poultry Update

   Just wanted to show you how much my quail and Freedom Ranger chicks have grown.  The quail are now 12 days old and are already getting their adult feathers.  I have 10 more eggs in the incubator.  I've been having about a 80-85% hatch rate so I feel pretty good about it. 
Coturnix quail, Japanese quail, White Phoenix chicken, Freedom Ranger hatchery, raising Freedom ranger chickens,
12 day old Coturnix quail.

Coturnix quail, Japanese quail, White Phoenix chicken, Freedom Ranger hatchery, raising Freedom ranger chickens,
12 day old Coturnix quail.
 

    Our Freedom Ranger chicks are growing really fast also (even though they are reportedly slow growing birds).   They are now 2 1/2 weeks old. 
Coturnix quail, Japanese quail, White Phoenix chicken, Freedom Ranger hatchery, raising Freedom ranger chickens,
Some of the 31 Freedom Ranger chicks sleeping.


     Finally, here is a picture of our White Phoenix.   We're pretty proud of her. We have a Golden Phoenix and some Silver Laced Phoenixs but this is our first white Phoenix and we think she is so pretty.  We can't wait until she matures.
Coturnix quail, Japanese quail, White Phoenix chicken, Freedom Ranger hatchery, raising Freedom ranger chickens,
White Phoenix 2 months old.


Follow my Pinterest board
Follow us on Facebook
Follow us on Twitter
Follow us on g+
Follow us on linkedin
Follow our Youtube channel

How to Make a Classic Christmas Rainbow Poke Cake

            This recipe has been around for a LONG time and to me, it never goes out of style.   It is colorful, festive, moist and utterl...