Thursday, March 7, 2019

How to Cook Ground Deer Meat


   Deer meat is lower in fat and cholesterol than other red meats.  It also has a higher amount of Vitamin B6, Vitamin B12 and the Omega 3 fatty acids.  

How to cook venison, how to prepare deer meat, how can I cook deer meat where it won’t taste gamey, things you should know about cooking venison, cooking ground deer meat


      I know a lot of people who refuse to eat deer meat because they say it tastes too “gamey” and it’s true it can taste that way but if you prepare it correctly, you can keep the majority of the gamey taste away. 

     The first thing you need to keep in mind is that venison (deer meat) is very lean and does not have the “marbling” of fat that beef does.  I fix this problem by adding a really decent amount of olive oil to the meat.  

    I have found the best way to cook ground venison is low and slow.  I just place 2 pounds of the ground venison into a pot on low heat.   I then add in 2 tablespoons of olive oil per pound of deer meat and a teaspoon of lemon juice per pound also.   Citrus tends to help mask the strong flavor of the deer meat. 

How to cook venison, how to prepare deer meat, how can I cook deer meat where it won’t taste gamey, things you should know about cooking venison, cooking ground deer meat


   To also help with the taste, I add in a tablespoon of dehydrated onions and a ½ teaspoon of garlic powder per pound of meat.   
 
How to cook venison, how to prepare deer meat, how can I cook deer meat where it won’t taste gamey, things you should know about cooking venison, cooking ground deer meat


Cook the meat on low heat, stirring as you brown the meat.  

How to cook venison, how to prepare deer meat, how can I cook deer meat where it won’t taste gamey, things you should know about cooking venison, cooking ground deer meat

     Once it is done, I divide up the meat into baggies and freeze it until you are ready to use it as I would ground beef.   I love using venison in my delicious No-Bean Chili Recipe
 
Follow us on Pinterest
Follow us on Twitter
Follow our Youtube Channel
Follow us on Instagram
 

I shared this blog post on the following blogs and link parties:
Meal Plan Monday 
Tuesdays with a Twist
Tuesdays at Our Home
The Blogger's Pit Stop


Wednesday, March 6, 2019

Crispy Air Fryer Potato Chips


    This air fryer potato chips are so easy to make and turn out so perfectly crispy!  Each tasty bite will blow your mind and they satisfy your salty craving without all the guilt!  


Air fryer potato chips, crunchy oil free potato chips, air fryer crunchy potato chips, air fryer potato chip recipe,


      Making these are so easy.  Just take 2-3 potatoes and rinse them well and then slice them into thin slices.   I have a mandolin and use it to make really thin slices.

Air fryer potato chips, crunchy oil free potato chips, air fryer crunchy potato chips, air fryer potato chip recipe,


  Once the potatoes are sliced, preheat your air fryer at 360 degrees.  Ours take just 3 minutes to preheat.  

    Place the slices on the crisper plate and do not overlap them. 


Air fryer potato chips, crunchy oil free potato chips, air fryer crunchy potato chips, air fryer potato chip recipe,

    Close the air fryer and turn on the timer for 10 minutes.  After the first minute, open the basket and salt the potato slices.  Close and resume heating.  After 4 minutes, begin to watch the potato chips closely so you do not burn them.  You want them browned but not burnt.  

Air fryer potato chips, crunchy oil free potato chips, air fryer crunchy potato chips, air fryer potato chip recipe,


   If you are new to air frying be sure to read my tips & tricks for using an air fryer.
   

Follow us on Facebook
Follow me on Pinterest
Follow us on Twitter
Follow our Youtube channel
Follow me on Instagram 


This recipe was shared on the following blogs & link parties:
The Blogger's Pit Stop


Monday, March 4, 2019

Line Drying in the Winter

     We have not owned a "powered" washer or dryer in over 10 years.  People often ask us how we dry our clothes during the winter and they are often shocked when I say we hang our clothes out to dry all year long!  Yes, it is possible to "dry" your clothes even when it is below freezing outside with a foot of snow on the ground!   Today, I will be telling you how it is done and the tips and tricks we have learned over the years.

line drying in the winter, line drying clothes in the winter, can i line dry my clothes in the winter, helpful tips for line drying clothes in the winter, don't stop hanging out to dry in the winter


     Did you know that using a dryer adds up to $25 a month (that is $300 a year)  to your electric bill?  Not only do you save money by drying your clothes on the line but your clothes smells so much better too.  There is nothing more delightful than the scent of fresh-air dryed clothes!

     Drying your clothes in the winter time is often referred to as "freeze drying".  It is not just like drying in the summer time but drying in the winter time is definitely possible but it takes a few different tips to get the job done right.  Here are the suggestions I would use.

      Be sure to hang your wet clothes on the line as early in the morning as you can.  Also, try to hang your clothes out on days that the humidity is not as high.  I just check the dew point and if the dew point is about the same as the temperature then I hang my clothes out to dry, if not, I just wait for a better day.  For example, today was 23 degrees and the dew point was 10 so it was close enough to the temp that I hung out my clothes.

     Of course, a windy day is always a good day to hang out laundry.  The wind really helps clothes feel more fresh and soft.  Also, if there is snow on the ground, you get the extra added effect of "snow bleaching".  And as always the biggest bonus of line drying is how fresh and clean your clothes smell.

     When you hang out your  clothes in the winter time, be sure to hang your shirts by the hemline and not by the shoulders.  This will keep the material from bunching up and when they freeze, the wrinkles would be super hard to get out.  When your clothes are "frozen", the moisture is pretty much out of your clothes so bring them in and lay them out and when they "defrost", they are pretty much dry and ready to be put away. An added bonus, my boys love to "sword fight" with frozen socks.  It is so funny to watch!

    Be sure to check out my other blog posts about how we wash our clothes and how we make our own laundry detergent and fabric softener!
 

Follow me on Pinterest
Follow us on Twitter
Follow our Youtube channel
Follow me on Instagram 

I shared this post on the following blogs and link parties:

The Blogger's Pit Stop


Sunday, March 3, 2019

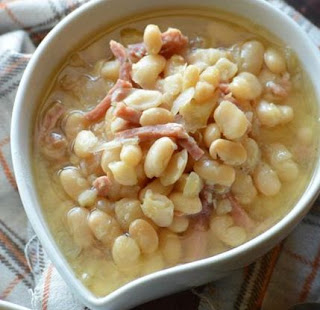
The Best Southern Ham & Beans Recipe

      There is nothing like a big pot of beans with ham to warm you up.  It is a real staple each winter in our home.  It is filling and makes a great meal when served with some of my cast iron skillet cornbread!


The Best Southern Ham & Beans Recipe

1-2 packets Goya ham concentrate
1 lb. ham hocks
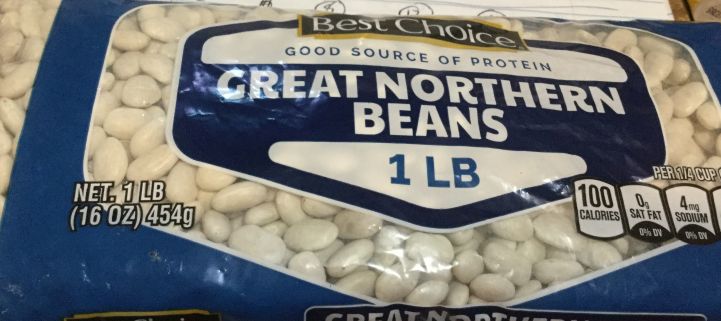
1 lb. Great Northern beans
1 tsp. salt
1/2 tsp. pepper


how to cook great northern beans, the best southern ham and beans recipe, cooking a pot of great northern beans, ultimate great northern beans recipe, cooking beans and ham, great northern bean soup,


     Using a colander, pour the beans into it and rinse the beans with cool, clean water.  Rinse well and then give them a shake.  Pick through the beans and remove any of the beans that are discolored.  

    Place the beans in a large pot and stir in the other ingredients, except for the ham hocks.  Cover the beans with water and turn on the stove to medium-high and allow the beans to come to a boil.  Allow them to boil for 2 minutes and then turn off your stove, remove the pot from the stove and allow the beans to sit for one hour.
    
     After the hour passes, put the pot back onto the stove, add in the ham hock and turn the stove to medium-high again and bring them back to a boil.  Reduce heat, stir and allow the beans to cook on low for 3-4 hours.  Be sure to stir them about every 30 minutes and keep adding water to the pot so the beans are covered with about a 1/2"-1" of water.  
  
     They are done with the beans are soft enough to eat.  Serve with cornbread or fried biscuits!  I always shred the ham hocks up after the beans are done so they are mixed in real well.  You can remove them if you prefer.

     Any leftovers can be stored in the refrigerator for up to 5 days.  They also freeze really well.


Follow us on Pinterest
Follow us on Twitter
Follow our Youtube Channel
Follow us on Instagram


Saturday, March 2, 2019

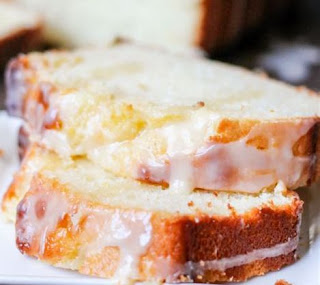
Quick & Easy Homemade Strawberry Bread with Strawberry Glaze

     This Strawberry bread is so moist and so delicious and once you add on the glaze, it literally melts in your mouth!  This bread makes the perfect dessert, breakfast or as a snack with a cup of coffee!  We have eaten this bread hot out of the oven and cold after it has been in the refrigerator several hours, it tastes equally good either way!


  Quick & Easy Strawberry Bread

FOR THE BREAD:

2 1/2 c. fresh (or frozen) strawberries 
2 c. flour + 2 T. flour, divided
3/4 c. sugar
1/2 c. milk
1/2 c. oil 
1 lg. egg
2 tsp. vanilla
1/4 tsp. salt


FOR THE GLAZE:

2 c. powdered sugar
1/3 c. finely diced strawberries
2 T. butter, melted
2 T. milk
2 tsp. vanilla 


    Preheat your oven to 350 degrees.  

     In a small bowl, finely dice up your strawberries.  

easy fresh strawberry bread, Quick strawberry bread, Quick & Easy Homemade Strawberry Bread with Strawberry glaze


     Stir in the 2 T. flour and stir to coat your strawberries.  Do not add in more than the 2 tablespoons. If they are not completely coated it is fine.  Coating the strawberries keeps them from sinking to the bottom of the batter and also helps to absorb some of the moisture of the strawberries. 

     In a large bowl, stir together your sugar, milk, oil and vanilla.  After it is mixed up, stir in the 2 cups of flour, baking powder, and the salt.  Stir but do NOT overmix the batter. 

    Fold in the diced strawberries.   

easy fresh strawberry bread, Quick strawberry bread, Quick & Easy Homemade Strawberry Bread with Strawberry glaze


     Grease a 9"x5" bread pan. Pour the batter in and spread it out evenly.

easy fresh strawberry bread, Quick strawberry bread, Quick & Easy Homemade Strawberry Bread with Strawberry glaze

      Set your kitchen timer for 50 minutes.  As your bread bakes, prepare your glaze.

      To make the glaze, just combine the ingredients (except for the strawberries) and stir well.  Fold in the strawberries.  It will be fairly thick and that is fine.  It will "melt" some when you spoon it onto the hot bread.

easy fresh strawberry bread, Quick strawberry bread, Quick & Easy Homemade Strawberry Bread with Strawberry glaze

    When your timer goes off, check to see if the bread is done by inserting a toothpick into the center of the bread. If the toothpick is clean, it is done and you can remove the bread from the oven.  If the toothpick is not clean, cook the bread for another 5 minutes and recheck.  

     Once it is done, let the bread cool for 5 minutes and then spoon the glaze onto your bread.  Slice and enjoy.  


     My bread almost falls apart as you can see but we do not care.  If you prefer bread that does not "fall apart"  just do not put as many strawberries.  Just add 2 cups instead of 2 1/2 cups.  

    If you like this recipe, you'll sure to love my Southern Peach Bread, my Pineapple bread, Glazed Orange Juice Bread and my Easy Blueberry Bread.


Sunday, February 24, 2019

How to Use an Air Fryer

   I LOVE fried foods but with my health the way it is, I should not eat fried foods.  Thank the Lord for an air fryer because it gives me food that tastes 100% fried but uses little to no oil.  I strongly encourage you to purchase one.  They are 100% worth the money.

How to use an air fryer, air fryer recipes, should I buy an air fryer, air fryer quick tips
   Not only does an air fryer "fry" food for you but it can also "roast" and "dehydrate"!  We have made so many different foods with our air fryer and they have turned out perfect every single time.  Crispy and delicious.  Your food will also retain its moisture content also.  Yum!

      To use an air fryer, you must preheat it.  Our air fryer takes just 3 minutes and it is ready to use.

      Be sure to not overcrowd your air fryer basket.  You must give your food enough room for the air to circulate.  Ours can easily cook a big plateful of french fries at one time so you don't have to "baby" it...just give it some room.

      Halfway thorugh the cooking time, you need to shake the basket a bit to be sure your food will cook evenly.  If the food you are cooking is delicate, like shrimp, or hard to shake, like big baked potatoes, then just use some tongs to reposition the food.

     When you are deep frying your food, you literally have to stand by and watch it carefully.  With an air fryer, you need to shake the food once half way through the cooking time and that is all.

      One thing I really like about the air fryer is that it doesn't heat up your home like your oven or a deep fryer does.  There is also very little clean up and I can cook virtually anything in the air fryer with ease.  It also cooks so much faster than other things do without having to sacrifice on flavor.

     I will be sharing air fryer recipes several times a week so be sure to subscribe to my newsletter so you won't miss any.

     Here is one of the first things I made in the air fryer:  Homemade Crispy Potato Chips and my Air Fryer Rosemary Potato chips!  They pair perfectly with my air fryer hamburgers and for dessert you can serve air fryer Oreos!


Follow us on Pinterest
Follow us on Twitter
Follow our Youtube Channel
Follow us on Instagram


Update on Ronny & Memorizing Memory Verses

As most of you know, Ronny is autistic. He is now 21 and besides being autistic he is also suffers from agoraphobia.  I am now bedbound due ...