Showing posts sorted by date for query cornbread. Sort by relevance Show all posts

Sunday, June 19, 2022

Delicious and Versatile Herbed Compound Butter


        Compound butter is just a stick of butter that has been seasoned with herbs and other ingredients.  Compound butter is so delicious and really elevates any food that you put it on.  This recipe is literally fool-proof so go ahead and try it out today.  This recipe is easy to adapt to your personal tastes.  

  • 1 stick unsalted butter, softened
  • 1 T. minced garlic
  • 1 T. parsley or chives
  • 1 T. oregano
  • 1 T. basil
  • 1 T. rosemary or thyme
  • ¼  tsp. salt
  • ¼ tsp. pepper

Mix all the ingredients together in a bowl.  Spoon mixture onto a piece of parchment paper and then roll it up into a log.  Twist the ends of the parchment paper to seal.  Refrigerate the log until it is firm which should take 3-4 hours.  Slice into rounds when ready to serve.  I often store mine in the freezer and just cut a round off when I need some.  Compound butter can be stored in your freezer for up to 6 months.

Ways to use Herbed Compound Butter:

Slather it onto cast iron skillet cornbread.  It will be so good that you will keep coming back for more. 


Rub it onto some corn-on-the-cob.  


Dot it onto a baked potato.


Rub it onto some crostini that your family won’t be able to get enough of. 


     Melt some into mashed potatoes.


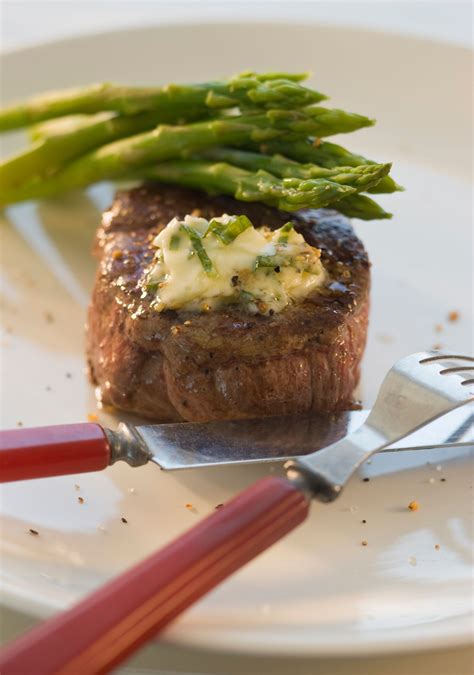
Lather it onto a beautiful steak.  


    If you give this recipe a try, please take a picture of it and tag me on Instagram @countrifiedhicks and use the hashtag #countrifiedhicks so I don't miss seeing your post! Also, please leave me a comment and let me know you were here!  I love to hear from my readers. 


Follow us on Pinterest
Follow us on Twitter
Follow our Youtube Channel
Follow us on Instagram


Tuesday, May 10, 2022

Baking Powder vs. Baking Soda: What’s the Difference?

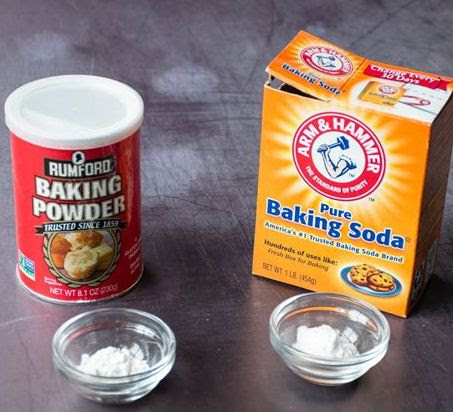
    Baking powder and baking soda are both leavening agents that cause baked goods to rise.  They look similar in looks but they are different and are used differently.  The main difference between baking powder and baking soda is that baking powder already has an acid in the chemical mixture and baking soda does not so it requires an acidic ingredient to help baked goods rise.  Many people do not know for sure how and when to use each one so today, I’m going to try to explain it all for you.


BAKING SODA:

            Baking soda is used in recipes that have acidic ingredients in them such as buttermilk, vinegar, lemon or citrus juice, yogurt or even brown sugar.  These acidic ingredients actually activate the baking soda and produces carbon dioxide which allows the baked goods to rise and become fluffy and light.  Be sure not to use too much baking soda.  Adding more baking soda will not make the baked good rise more.  If you use too much, the leftover baking soda that did not react will make your baked goods have a metallic or bitter taste and nobody wants that.

            Baking soda has an infinite shelf life so no matter how old it is, it is still safe to eat but it can lose its efficacy over time.  An unopened box of baking soda stays potent for about 2 years and if you have an opened can, replace it about every 6 months. If you are not sure if your baking soda is still effective, just stir ¼ teaspoon of baking soda into 3 tablespoons of either lemon juice or vinegar.  If it bubbles up then you know the baking soda is still good.

Baking soda is often used in things like cakes, muffins, and cookies.  

For instance, I use baking soda in my Butter Dip Biscuits,  Cast Iron Skillet Cornbread, in Snickerdoodle Muffins, and in my Cast Iron Skillet Banana Bread.


BAKING POWDER:

            Baking powder is made up of baking soda and a dry acid such as cream of tartar and is considered a complete leavening agent because it just needs to be combined with a liquid to activate it. Baking powder is often used in things like biscuits, cornbread, or pancakes. A good rule of thumb to use if you are creating your own recipe is to use one teaspoon of baking powder per one cup of flour.

            Baking powder is also always safe to eat but also loses its potency over time.  An unopened can should last about 1 ½-2 years and you should replace your open baking powder every 3-6 months.  To test your baking powder to see if it is still potent, stir ½ teaspoon of baking powder in a bowl with about 1 tablespoon of hot water.  If it bubbles up, then it is still good.

If you would like to learn how to mix up your own homemade baking powder, you can learn how by clicking on this link: Homemade Baking Powder.

     I use baking powder in my recipes such as: my Blueberry Biscuits, Homemade Blueberry Pancakes, and in my Chocolate Chip Biscuits.


SUBSTITUTING BAKING POWDER FOR BAKING SODA:

            You can swap baking powder for baking soda in recipes but keep in mind that baking soda is a lot stronger than baking powder so you need about 3 times more baking powder as you would baking soda to get the same rise.

     I actually use baking powder and baking soda both in some of my recipes such as in my Angel Biscuits, in my Old-Fashioned Butter Cake, in my Homemade Cheddar Biscuits, and in my Root Beer Chocolate Cake!


    I hope you have found this article informative.  


Follow me on Youtube
Follow me on Instagram 
Follow me on Pinterest
Follow me on Twitter


Thursday, April 28, 2022

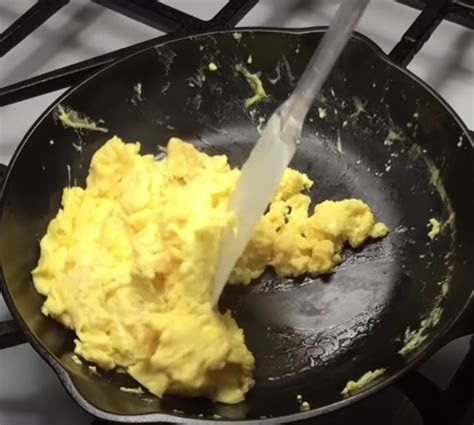
Cooking Fluffy Scrambled Eggs in a Cast Iron Skillet


                I LOVE to cook in my cast iron skillets.  My most favorite thing to cook in cast iron is of course cornbread but I make a lot of other things in them too and today I am going to show you how to cook eggs in the cast iron!  It is so easy to make perfect scrambled eggs in a cast iron that doesn’t stick and they taste so good this way!

                 First, turn on your stove to medium-high and put your seasoned cast iron skillet on the stove to heat up.  Once it begins to get hot, add in either a tablespoon of butter, lard or even coconut oil.  Don’t skimp on the “fat”.  These kinds of “fat” are healthy and natural and provide a lot of benefits and make your eggs turn out so lovely.


                 While your ”fats” are melting , take 6 or more eggs and whip them thoroughly in a bowl.  Be sure to whip them extra good.  This adds air into the mix and helps make them nice and fluffy when they cook.

                 Once the skillet is nice and hot and the eggs are whipped properly, pour the eggs into the skillet.  Don’t stir the eggs or touch them for the first 20-25 seconds.  Just let them cook.  Then take a spatula and go around the edges to loosen the eggs and then you can start “stirring” eggs as they cook.

                 Once the eggs are cooked, scoop them out of the pan and enjoy.  There you have it.  That is all there is to it!  Enjoy!

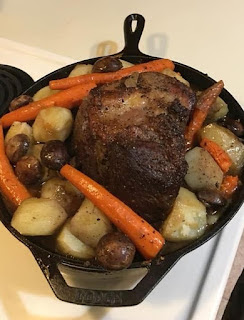
                Be sure to check out more of my cast-iron skillet cooking recipes: Cast Iron Skillet Cornbread, Roast Dinner, and Cast Iron Skillet Banana Bread.


  If you give this recipe a try, please take a picture of it and tag me on Instagram @countrifiedhicks and use the hashtag #countrifiedhicks so I don't miss seeing your post!


Follow us on Pinterest
Follow us on Twitter
Follow our Youtube Channel
Follow us on Instagram


Update on Ronny & Memorizing Memory Verses

As most of you know, Ronny is autistic. He is now 21 and besides being autistic he is also suffers from agoraphobia.  I am now bedbound due ...